

csrnet@ This tutorial will guide you through upgrading Windows XP, Windows
Vista, and Windows 7 to Windows 8. As Windows 8 can be temperamental
when performing upgrades on older computers, it is important to make
sure your computer is compatible and has the proper hardware
requirements before upgrading. The easiest method to determine if your
computer will have problems upgrading to Windows 8 is to use the Windows
8 Upgrade Assistant. The upgrade assistant will scan your devices and
applications to make sure there will not be any conflicts that will
prevent you from properly upgrading to Windows 8. More information about
how to use the Windows 8 Upgrade Assistant can be found in this
tutorial: How to use the Windows 8 Upgrade Assistant.
In order to upgrade to Windows 8, Microsoft recommends that you have
hardware that is equivalent or better than the following requirements:
| Windows Version | What can be Transferred |
| Windows XP | Personal files |
| Windows Vista | Windows settings and personal files |
| Windows 7 | Apps, Windows settings, and personal files |
| Windows 8 Release Preview | Personal files |
| Windows Developer Preview | Nothing, but you can retrieve your files later from the Windows.old folder. |
| Windows 8 Consumer Preview | Nothing, but you can retrieve your files later from the Windows.old folder. |
- Install all updates available for your operating system.
- Scan your computer with an up-to-date anti-virus program.
- Uninstall your anti-virus software. When Windows 8 is finished installing, you will automatically be protected by Windows Defender, which will give you protection while you decide if you wish to install a different antivirus program.
- Uninstall any applications that are labeled as issues by the Windows 8 Upgrade Assistant.
- Disconnect any devices that are connected to your computer other than your drives, keyboard, and mouse.
Tutorials on how to use the Windows 8 Upgrade Assistant or to create a Windows 8 DVD can be found below.
How to use the Windows 8 Upgrade AssistantOnce you have a product key, let's proceed with the actual upgrade.
How to download and create a bootable Windows 8 Upgrade DVD
Launch the Upgrade Process
As already stated you can perform a Windows 8 upgrade using a Windows 8 DVD that you have created or directly from the files that were downloaded to your computer by the Windows 8 Upgrade Assistant. Both methods of launching the upgrade process can be found below.
Method 1: Start the Upgrade Process from the Desktop
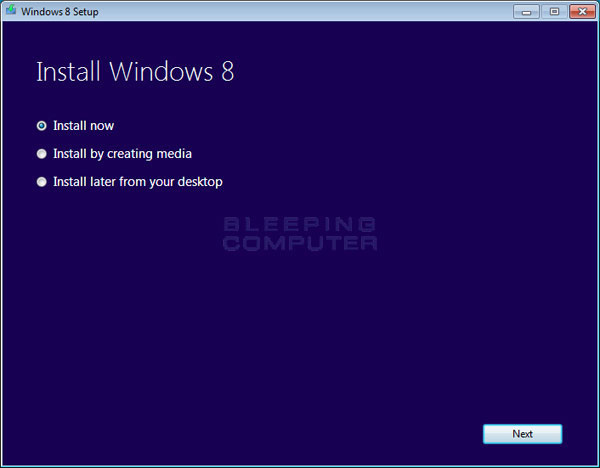
When you run the Upgrade Assistant and purchase a product key it will automatically download all the files necessary to upgrade your computer to Windows 8. It will also create a shortcut on your desktop labeled Install Windows. Double-click on the Install Windows shortcut and a setup program will launch that prompts you for what you would like to do.Method 2: Start the Upgrade Process through a Windows 8 DVD
Select the Install now option and then click on the Next button. The setup program will automatically connect to the Internet and check for available updates that may help the upgrade go more smoothly. If new updates are found they will be installed automatically and the Windows 8 Update setup program will restart. After it has finished restarting you will be at the license agreement page for Windows 8. You should now skip to the rest of the upgrade process by clicking here.
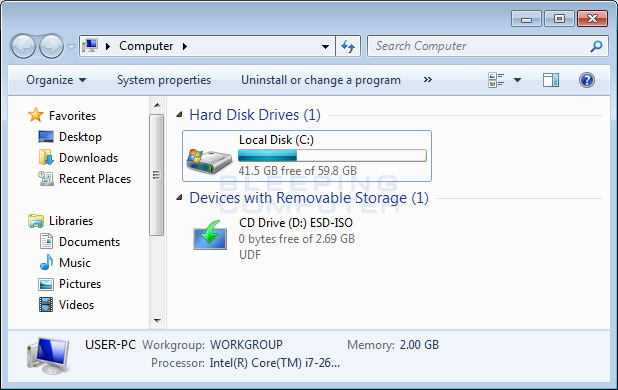
If you have decided to install Windows 8 using a Windows 8 DVD, please insert the DVD into your computer. Once the media is inserted click on the Start button and then click on the Computer option. This will open the Computer screen where you will see any available CD drives or flash drives.
As shown in the above image, we will be upgrading Windows 8 from the Windows 8 DVD inserted into the D: drive. To start the upgrade process simply double-click on the drive with the Windows 8 Media.
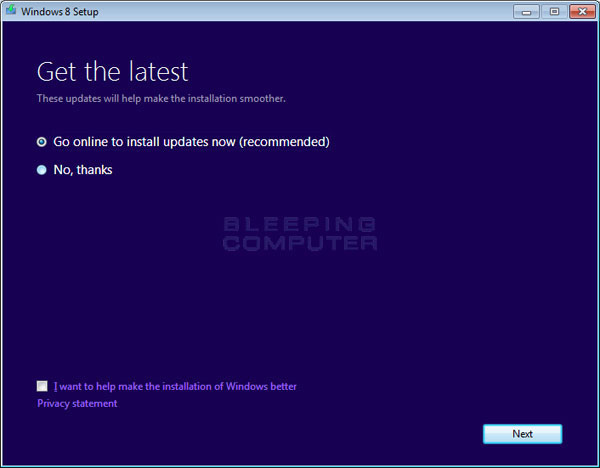
When the setup launches it will prompt you to check for new updates for the upgrade process.
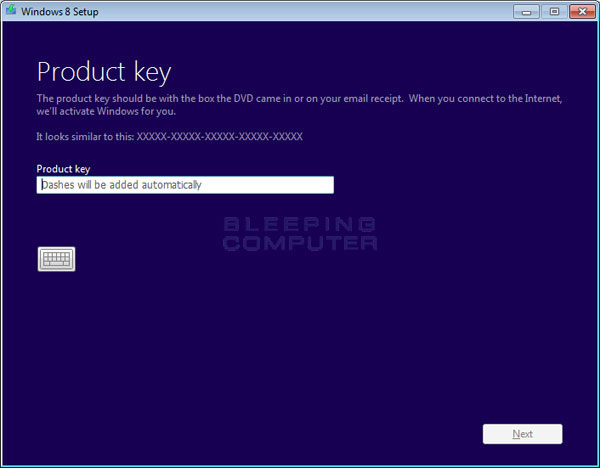
Select the option labeled Go online to install updates now (recommended) and then press the Next button. The setup program will now connect to the Internet and check for available updates that may help the upgrade go more smoothly. If new updates are found they will be installed automatically and the Windows 8 Update setup program will restart. After it has finished restarting you will be presented with a screen asking you to enter your product key.
Enter your product key and then click on the Next button. The main upgrade process will begin and you should continue to the next section to learn how to proceed.
Upgrade your computer to Windows 8
Regardless of how you started the Windows 8 upgrade, you should now be at the screen where the setup program is asking you to review and agree to the Windows 8 license agreement.
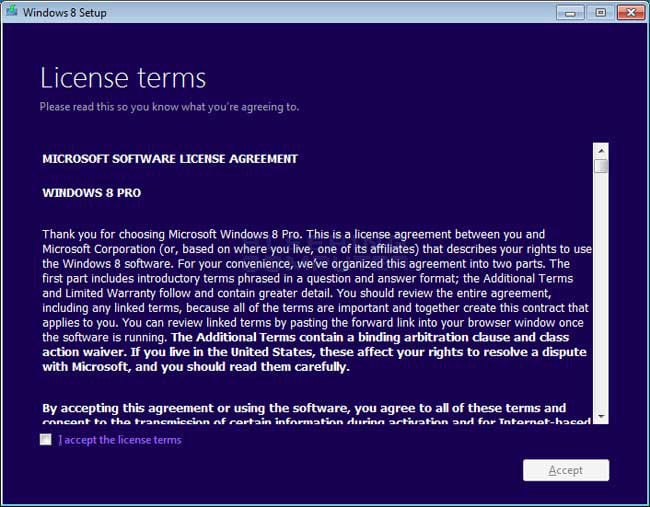
Please read through the license agreement and put a check mark in the box labeled I access the license terms. Then click on the Accept button. You will now be at a screen asking what you would like to transfer to Windows 8.
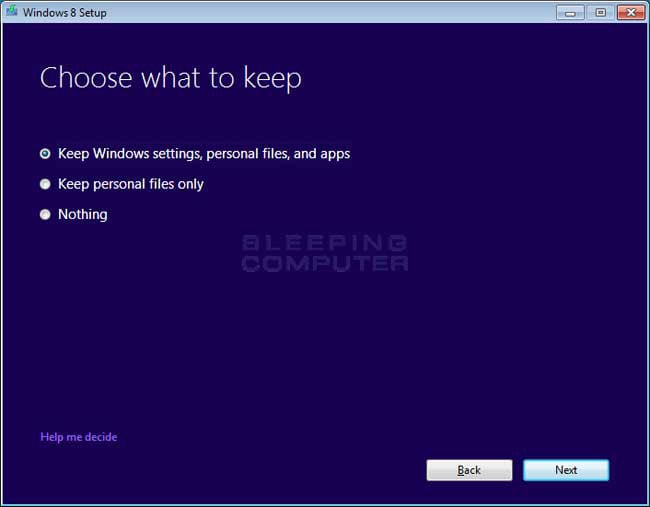
Depending your version of Windows, you will have the option to transfer nothing, your personal files, your settings, and your apps. For the cleanest experience, you should select Nothing, but please select the option that works best for you and then click on the Next button.
The setup program will check a few things to make sure you are ready to upgrade to Windows 8 and then display a final confirmation screen that shows what options you have selected for the upgrade.
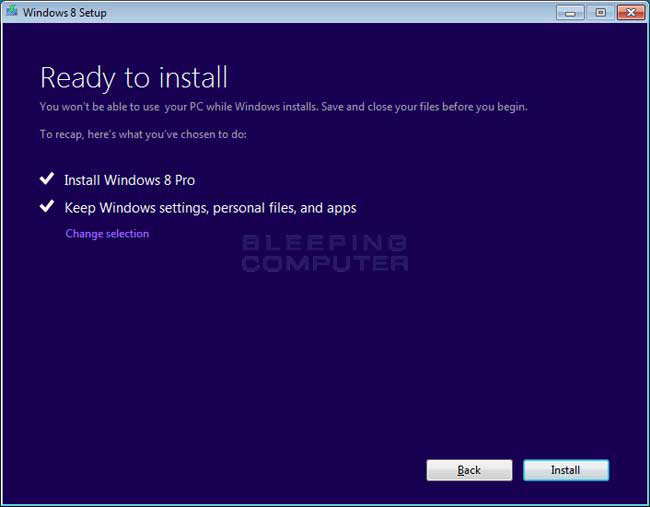
If the selection is correct, click on the Install button and the upgrade process will begin.
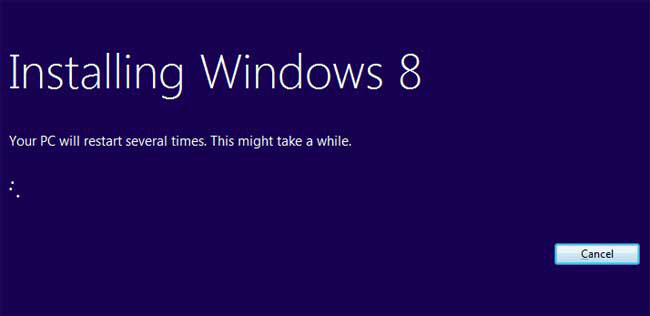
During the installation process your computer may reboot numerous times. This is perfectly normal and you should not be concerned. This process may also take quite a while, so please be patient. Eventually you will arrive at the next screen, which prompts you to set the background color you would like to use on the Windows 8 Start screen.
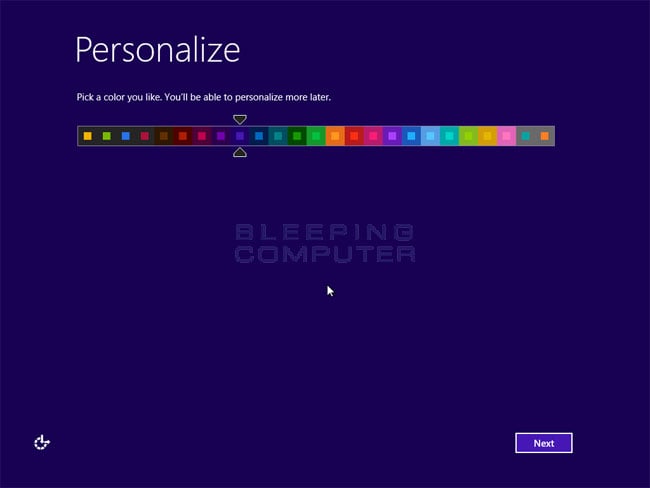
Select the color that you wish to use for your Windows Start Screen background and then click on the Next button. You will now be at a screen where you can choose some default settings that are designed to give you a optimal and secure Windows 8 experience or the ability to customize these settings.
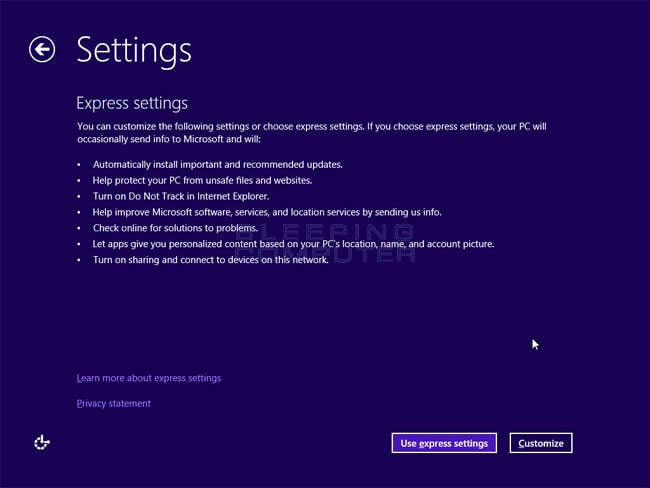
If you wish to use the default settings, click on the Use express settings button and skip here. Otherwise, click on the Customize button to customize these settings. When you click on the Customize button you will be brought to a screen asking if you would to enable sharing on your network.
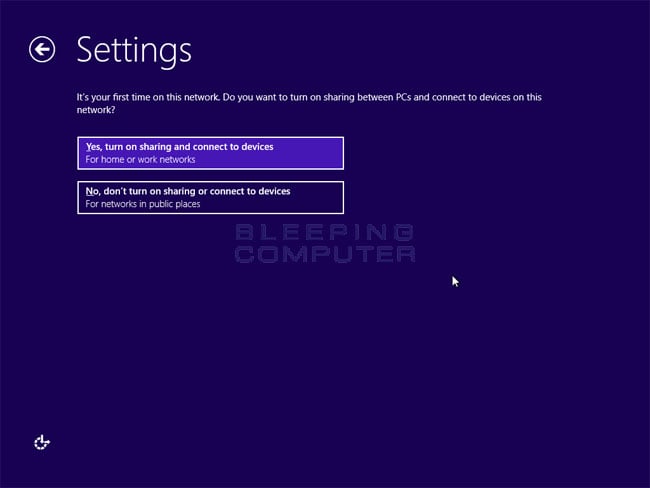
If you plan on sharing your files or devices with another computer, then you should click on Yes, turn on sharing and connect to devices. Otherwise, click on the No button to disable sharing,
You will then be shown a screen asking how you would like to use Windows Update and privacy options you want enabled.
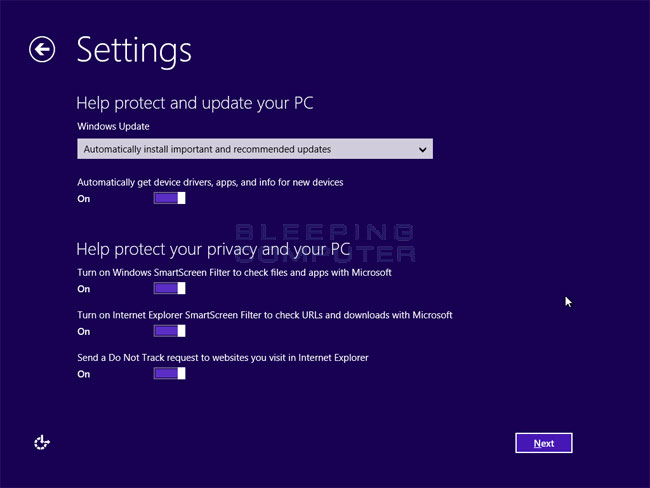
You should leave all of these options at the default settings and then click on the Next button.
You will now be at a screen with a variety of settings related to how you wish to share your usage information with Microsoft.
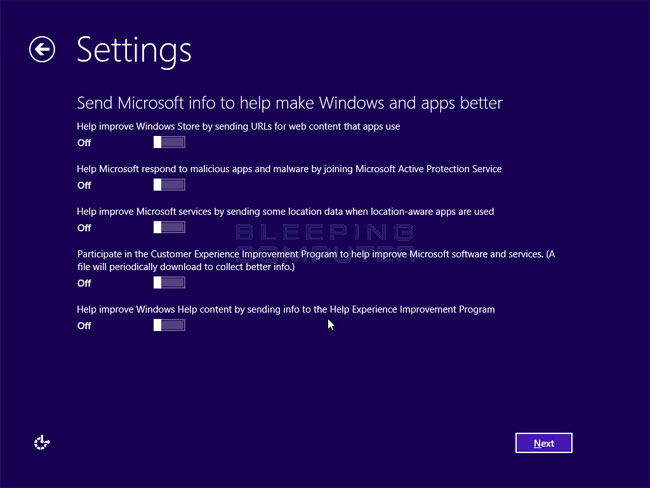
Review each setting and disable any setting for information that you do not wish to share with Microsoft. When you are ready, click on the Next button.
You will now be at another screen with a variety of settings that you can configure.
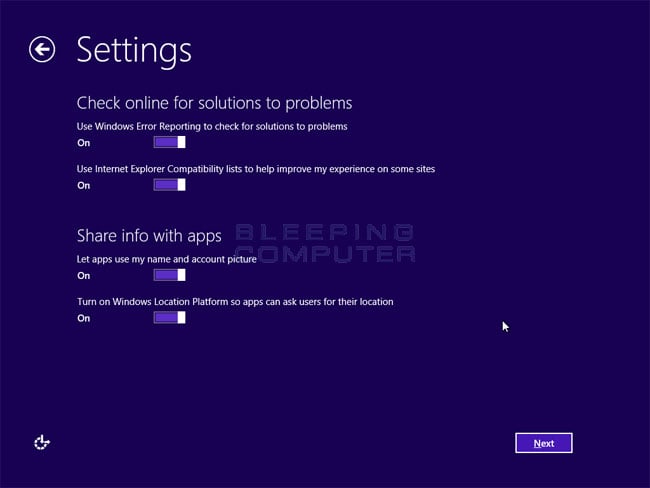
For the check online category, you should leave all of those enabled. For the Share info section, disable those settings that you do not wish enabled. When you are ready, click on the Next button.
You will now be at a screen where you will be asked to enter the password for your account. This is the same password that you used in the previous version of Windows that we just upgraded.

Please enter your password and then click on the Next button. You will now be shown a screen that asks if you would like to login with a Microsoft Account or to continue with your normal user account.
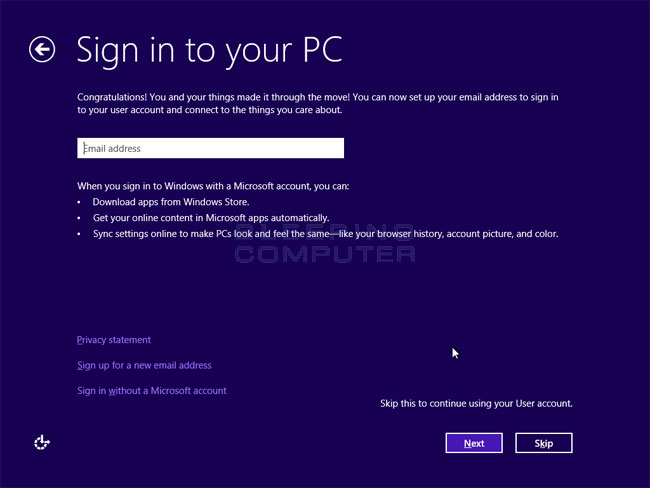
As you can always change your account to a Microsoft account in the future, I suggest you familiarize yourself with Windows 8 using a local account for now. If you wish to switch your account to a Microsoft account in the future this can be easily done at any time by following the steps in this tutorial:
How to switch between a Microsoft account and a local accountPlease click on the Skip button to continue to the next screen. Windows will now start preparing your user profile for Windows 8. This process can take a while, so Windows 8will show you a tutorial on how to use the new Windows 8 Start Screen and other new features while you wait. When it is done preparing your user profile, you will be shown your Windows Start Screen as seen in the image below.
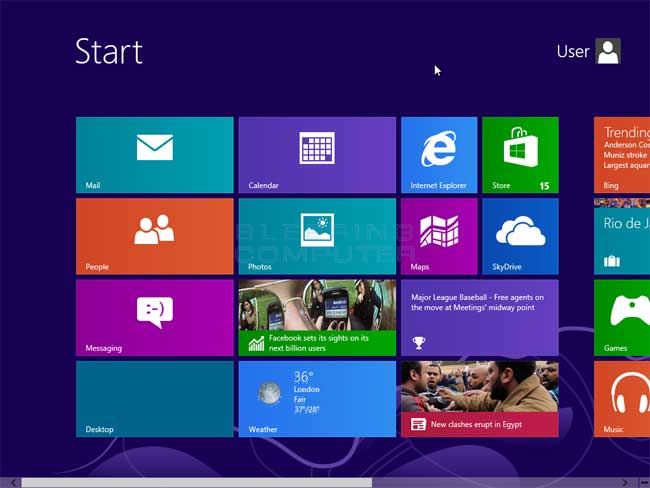
Your computer has now been upgraded to Windows 8 and you can start exploring the Windows Start Screen and apps.
There are now two steps that you should immediately perform after you install Windows. These are:
- Change your time zone. This guide will explain how to perform this task: How to change your time zone in Windows 8
- If one is not already made, create a Windows 8 DVD. This guide will explain how to perform this task: How to download and create a bootable Windows 8 Upgrade DVD
How to remove the Windows.old and $Windows.~BT folders after you upgrade WindowsWe have put together a list of tutorials below that can help you familiarize yourself with the new interface and features of Windows 8:
- Introduction to the Windows 8 Start Screen
- Introduction to the Windows 8 Charm Bar
- Adding and removing apps and programs from the Windows 8 Metro Start Screen
- How to resize, move, and create new App tile groups in Windows 8
- How to uninstall an App in Windows 8
- How to close an app in Windows 8
- How to log off Windows
- How to shut down or restart Windows
- How to play DVDs in Windows 8
- How to use Family Safety to monitor your children's activity in Windows 8
- How to create a start screen tile for a web site in Windows 8
- How to add a Start Menu to Windows 8 using Classic Shell
readmore; http://www.bleepingcomputer.com/tutorials/how-to-upgrade-to-windows-8/
![]() Posted By Sameera Chathuranga
Posted By Sameera Chathuranga
Lorem ipsum dolor sit amet, consectetur adipisicing elit, sed do eiusmod tempor incididunt ut labore et dolore magna aliqua. Ut enim ad minim veniam, quis nostrud exercitation test link ullamco laboris nisi ut aliquip ex ea commodo consequat contact me
Thank You
![OPPO Joy [R1001] - White](http://www.bhinneka.com/Data/image_product/OPPO-Joy-[R1001]-White-SKU01214626_0-20140902134835.jpg "OPPO Joy [R1001] - White")

![TP-LINK N750 Wireless Dual Band Gigabit Router [TL-WDR4300]](http://www.bhinneka.com/Data/image_product/TP-LINK-N750-Wireless-Dual-Band-Gigabit-Router-[TL-WDR4300]-SKU00712872_0-20140417101429.jpg "TP-LINK N750 Wireless Dual Band Gigabit Router [TL-WDR4300]")

![ASUS Wireless-N Router [RT-N12HP]](http://www.bhinneka.com/Data/image_product/ASUS-Wireless-N-Router-[RT-N12HP]-SKU00113615_0.jpg "ASUS Wireless-N Router [RT-N12HP]")
![ASUS Fonepad 7 [FE170CG] - Mica Black](http://www.bhinneka.com/Data/image_product/ASUS-Fonepad-7-[FE170CG]-Mica-Black-SKU00614737_0-20140506151255.jpg "ASUS Fonepad 7 [FE170CG] - Mica Black")


![ASUS Wireless-N Router [RT-N10U B]](http://www.bhinneka.com/Data/thumbnail_product/ASUS-Wireless-N-Router-[RT-N10U-B]-SKU01112255-20140417090227.jpg "ASUS Wireless-N Router [RT-N10U B]")


![SAMSUNG Galaxy Camera 2 [GC200] - White](http://www.bhinneka.com/Data/thumbnail_product/SAMSUNG-Galaxy-Camera-GC200-White-SKU00314420.jpg "SAMSUNG Galaxy Camera 2 [GC200] - White")
![SANDISK Extreme II Desktop [SDSSDXP-120G-G26]](http://www.bhinneka.com/Data/thumbnail_product/SANDISK-Extreme-II-Desktop-[SDSSDXP-120G-G26]-SKU01213130.jpg "SANDISK Extreme II Desktop [SDSSDXP-120G-G26]")
![CORSAIR Memory Notebook 8GB DDR3 PC-10600 [CMSO8GX3M1A1333C9]](http://www.bhinneka.com/Data/thumbnail_product/CORSAIR-Memory-Notebook-8GB-DDR3-PC-10600-[CMSO8GX3M1A1333C9]-SKU00911963-20140422104325.jpg "CORSAIR Memory Notebook 8GB DDR3 PC-10600 [CMSO8GX3M1A1333C9]")

![TP-LINK Outdoor Wireless Access Point [TL-WA7210N]](http://www.bhinneka.com/Data/thumbnail_product/TP-LINK-Outdoor-Wireless-Access-Point-[TL-WA7210N]-SKU01413236-20140513114348.jpg "TP-LINK Outdoor Wireless Access Point [TL-WA7210N]")


![ACER Iconia [W511] - (Non Docking)](http://www.bhinneka.com/Data/thumbnail_product/ACER-Iconia-[W511-]-(Non-Docking)-SKU00113506.jpg "ACER Iconia [W511] - (Non Docking)")
![ACER Iconia [W510] - (Non Docking)](http://www.bhinneka.com/Data/thumbnail_product/ACER-Iconia-[W510]-SKU01212580.jpg "ACER Iconia [W510] - (Non Docking)")
0 komentar:
Posting Komentar